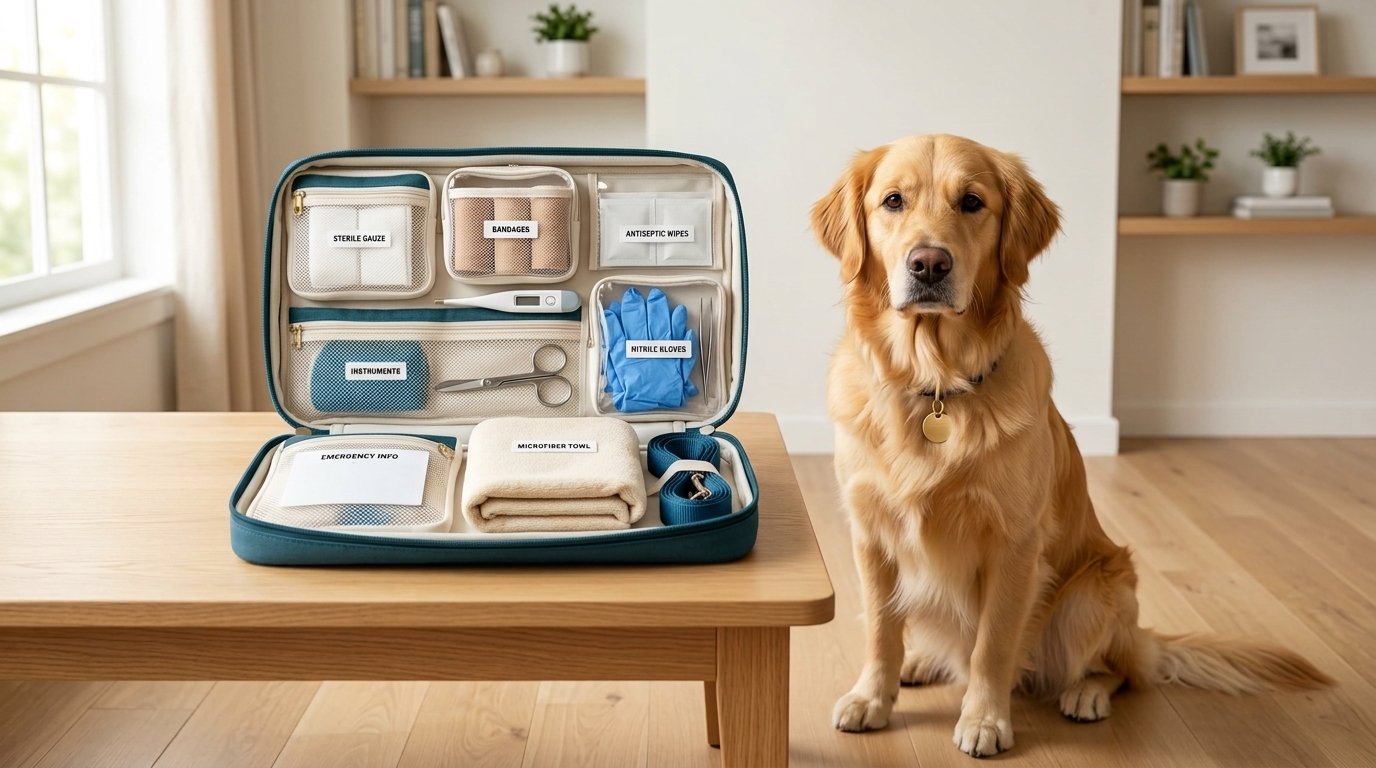
A well-planned dog first aid kit helps you respond calmly to a minor cut, remove surface debris from a wound, or prepare your dog for safe transport to a veterinarian. It can also keep phone numbers, medical information, and basic supplies in one place when every minute feels important.
Your dog first aid kit is not a portable veterinary clinic. It cannot diagnose an injury, reverse poisoning, repair a fracture, or replace emergency care. Its purpose is to support basic first aid and help you reach professional care without avoidable delay.
This guide explains the 15 core supplies worth packing, a simple way to organize them, adaptations for the car or trail, and the items that can cause harm when used without veterinary direction.
Table of Contents
Why Every Owner Needs a Dog First Aid Kit
Dogs investigate the world with their noses, mouths, and paws. Even a careful owner may eventually face a torn nail, small scrape, insect sting, broken piece of glass, heat-related illness, or sudden vomiting. Supplies scattered across a bathroom cabinet are difficult to find during a stressful moment. A dedicated kit puts basic tools and critical information together.
The American Animal Hospital Association’s pet first aid guidance makes an equally important point: owning supplies is only part of being prepared. You should know what each item does and obtain practical first aid training before an emergency occurs.
A dog first aid kit is useful in four situations:
- Minor problems: You can rinse a superficial wound, cover it loosely, or protect an irritated paw while arranging advice.
- Transport: Towels, gauze, a leash, and contact details can help you move an injured dog with less risk.
- Information: Medical records and phone numbers reduce the time spent searching while you are worried.
- Disasters or travel: Familiar supplies are available even when stores are closed or you are far from home.
First aid should never delay a call to a veterinarian. A small-looking puncture may hide deeper damage, and a dog that appears stable can deteriorate. When uncertain, call your regular clinic or the nearest emergency hospital and follow its instructions.
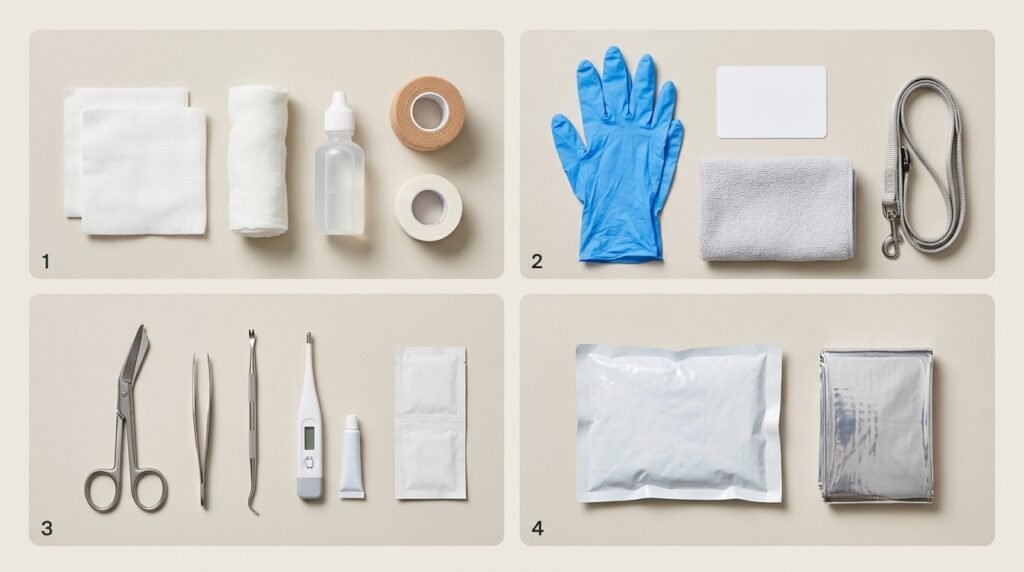
Dog First Aid Kit Checklist: 15 Core Essentials
The best dog first aid kit is compact enough to carry but complete enough to support safe, basic action. Avoid medications or specialized equipment you have not been trained to use.
1. Emergency contacts and medical information
Place a waterproof card at the top of the kit with your veterinarian’s number, the nearest 24-hour emergency hospital, and a poison-control contact. Include your dog’s name, recent weight, age, microchip number, medications, allergies, medical conditions, vaccination record, and your emergency contact.
Keep a paper card in case your phone is unavailable. For suspected toxin exposure in the United States, the ASPCA Animal Poison Control Center is available around the clock at (888) 426-4435; a consultation fee may apply.
2. Disposable nitrile gloves
Gloves reduce contact with blood, drainage, chemicals, vomit, and feces. Nitrile is a useful latex-free option. Pack several pairs in a resealable bag because gloves tear and one incident may require more than one pair.
3. Sterile saline wound wash
Pack sealed, unmedicated sterile saline labeled for wound irrigation. It can help flush dirt or loose debris from a superficial injury and may also be useful when a veterinarian directs you to rinse an eye.
Do not touch the bottle tip to the wound or use homemade salt mixtures for an eye injury. Chemical eye exposure requires immediate professional guidance.
4. Sterile gauze pads
Individually wrapped gauze pads can absorb blood, cover a wound, or provide a clean layer under a bandage. Carry several sizes. For active bleeding, place gauze over the area and apply steady, direct pressure while arranging veterinary care.
If blood soaks through, add material on top and continue pressure. Heavy bleeding, pale gums, weakness, or collapse is an emergency.
5. Rolled gauze
Rolled gauze can hold a pad in place or provide a soft layer beneath cohesive wrap. It should be snug enough to stay put but never tight enough to impair circulation. Unless a veterinarian tells you otherwise, treat a home bandage as a short-term measure for transport.
Swelling, cold toes, pain, chewing, moisture, odor, or slipping means the wrap needs prompt attention. Improper bandages can injure tissue.
6. Self-adhering cohesive bandage
Cohesive wrap sticks to itself rather than fur, making it convenient for securing gauze. It also tightens easily as it is stretched. Unroll some material before applying it, use minimal tension, and keep the end accessible.
Never wrap the neck or chest or use cohesive bandage as a tourniquet. Ask your veterinarian to demonstrate proper bandaging.
7. Nonstick wound pads
Non-adherent pads help cover a superficial wound without sticking as readily as dry cotton or tissue. They are especially useful as the layer directly over an abrasion. Choose individually sealed pads and replace any package that becomes wet, torn, or dirty.
Deep wounds, bites, punctures, burns, and wounds over a joint need veterinary evaluation rather than repeated home dressing.
8. Blunt-tip bandage scissors
Bandage scissors can cut tape, gauze, or a wrap. A blunt tip reduces—but does not eliminate—the risk of accidentally cutting skin. Slide a finger between the material and your dog whenever possible, cut away from the body, and keep the tool in a protective sleeve.
Do not cut at an embedded object. Stabilize the object as best you can and go to an emergency veterinarian; removal can trigger severe bleeding or worsen internal damage.
9. Medical adhesive tape
One-inch medical tape can secure gauze, label a dressing with the time it was applied, or hold a loose bandage component. It should not circle a limb tightly, and it should not be placed directly on a large area of fur if it can be avoided.
Pack a fresh roll in a small bag so dirt does not contaminate the edges.
10. Digital thermometer and lubricant
A pet-dedicated digital rectal thermometer provides more useful information than judging the nose or ears by touch. Label it clearly, include water-based lubricant, and store both in a sealed pouch.
Temperature-taking is not safe for every dog or every emergency. A frightened or painful dog may bite, struggle, or sustain injury. Do not force the procedure; call the clinic if you are unsure. Never use a glass mercury thermometer.
11. Tweezers
Fine-tip tweezers can lift a small, clearly visible piece of surface debris or grasp a tick close to the skin. Clean the tool before and after use. Do not probe a wound or dig for material below the surface.
12. Tick-removal tool
A purpose-designed tick tool can make steady removal easier than fingers. Follow the product instructions, avoid crushing the tick, clean the bite area, and note the date and location on the dog’s body. Keep the tick in a sealed container if your veterinarian recommends identification.
13. Clean towel or absorbent pad
A folded towel can provide gentle pressure, warmth, padding, or a clean surface. An absorbent pad can help control mess during transport. A towel may also help move a small dog, but a suspected spinal injury requires minimal movement and immediate professional instructions.
Keep at least one towel sealed and dry. Replace it after every use rather than returning a damp item to the kit.
14. Slip lead or spare leash
Pain and fear can make even a normally calm dog bolt or bite. A spare leash helps maintain control during transport. A slip lead can be useful if a collar has broken, but it must never restrict breathing.
Do not muzzle a dog that is vomiting, struggling to breathe, unconscious, overheated, or has facial trauma. A leash is a control aid, not permission to force handling that may be unsafe.
15. Instant cold pack and emergency blanket
A wrapped instant cold pack may be used briefly for localized swelling when a veterinarian advises it; never apply it directly to skin or let the dog chew it. A compact emergency blanket can help conserve warmth during transport, but an overheated dog should not be wrapped.
Temperature control depends on the situation. Dogs showing signs of heat illness need prompt cooling and emergency veterinary care. PawMindTips’ guide to keeping a dog cool during summer explains preventive steps, but suspected heatstroke is not a wait-and-see condition.
How to Organize a Dog First Aid Kit for Fast Access
Organization matters because stress reduces working memory. A clear, water-resistant dog first aid kit that opens flat is easier to use than a deep bag of loose supplies. Label it clearly.
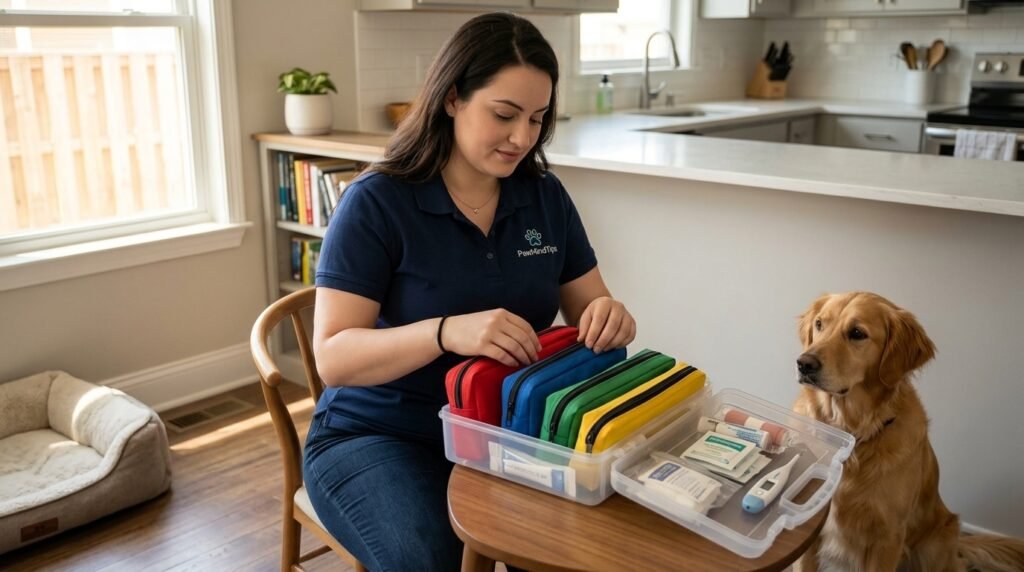
Divide the contents into four color-coded modules:
- Red—urgent information: Emergency card, medical history, current medication list, recent photo, and a small notebook with a permanent marker.
- Blue—cleaning and protection: Gloves, saline, nonstick pads, and sterile gauze pads.
- Green—bandaging and tools: Rolled gauze, cohesive wrap, tape, scissors, tweezers, and tick tool.
- Yellow—transport and monitoring: Thermometer, lubricant, towel, absorbent pad, leash, cold pack, and emergency blanket.
Place the emergency card and gloves where they can be reached without moving anything else. Keep sharp tools in sleeves. Put liquids in a separate leak-resistant bag, and use labels with large print. Write expiration dates on the outside of each pouch.
Add a one-page inventory so anyone in the household can identify what is missing. Do a practice run: ask another adult to locate gloves, gauze, and the emergency number. If it takes more than a few seconds, simplify the layout.
Store the main kit in a dry, temperature-controlled location that adults can reach quickly but children and pets cannot. Tell family members, sitters, and dog walkers where it is. A locked medicine cabinet is appropriate for veterinarian-prescribed products, but basic first aid tools should remain quickly accessible.
Build Separate Home, Car, and Travel Kits
One dog first aid kit rarely serves every setting well. Keep a comprehensive home version and a smaller grab-and-go version. Adapt travel supplies to the terrain, weather, and distance from veterinary care.
Home kit
Use the complete 15-item checklist and keep copies of medical records. Add your veterinarian-approved supplies for your dog’s known conditions. If an older dog takes several prescriptions, maintain a current medication list rather than storing extra doses in the first aid case without a plan.
Preparing for emergencies has a cost, but basic supplies are usually predictable expenses. The PawMindTips breakdown of dog care costs can help owners budget for routine care, an emergency fund, and supplies without treating the kit as insurance against a hospital bill.
Car kit
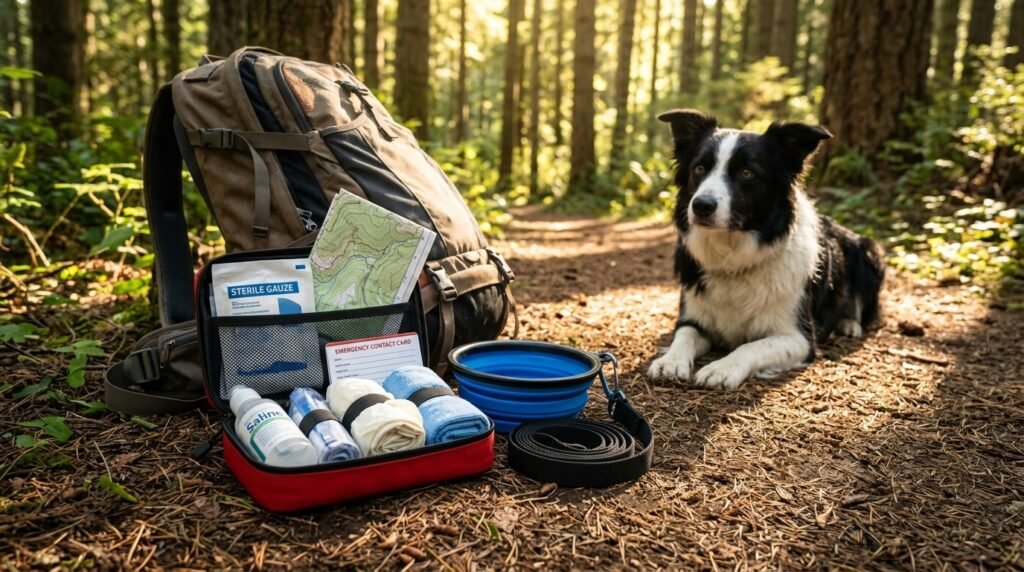
Keep a compact duplicate rather than moving the home kit back and forth. Add bottled water, a collapsible bowl, waste bags, a spare leash, a towel, and a copy of the emergency card. Do not leave medicines, saline, adhesives, or other temperature-sensitive items in a vehicle through extreme heat or freezing weather. Carry those items with you in an insulated bag when needed.
Hiking or travel kit
Prioritize light, multi-use items: gloves, gauze, nonstick pads, rolled gauze, cohesive wrap, saline, tape, scissors, tweezers, a leash, a towel, and contact information. Download an offline map and identify veterinary hospitals along the route before leaving.
For flights or interstate travel, bring copies of health documents required by the carrier or destination. Keep the kit in an accessible bag, not buried beneath luggage.
How to Use First Aid Supplies Safely
A dog first aid kit is most effective with a simple response plan: protect yourself, assess the scene, call for guidance, provide appropriate basic care, and transport safely.
First, look for hazards such as traffic, fire, aggressive animals, electricity, broken glass, smoke, or chemicals. Do not become a second victim. Approach slowly and speak calmly. Injured dogs may bite reflexively, even when they know and trust you.
Next, check whether your dog is responsive and breathing without forcing the mouth open. Look for major bleeding. Call an emergency veterinarian and describe what happened, when it happened, your dog’s approximate weight, current signs, and anything already done. Put the phone on speaker if another person is available to help.
Provide only the first aid you understand and that does not delay transport. That may mean applying direct pressure with gauze, gently rinsing surface contamination, or covering a wound. It does not mean exploring a puncture, straightening a limb, inducing vomiting, or giving medication.
For suspected poisoning, collect the packaging or photograph the label. Note the substance, estimated amount, and time of exposure. The ASPCA advises owners to contact a veterinarian or poison control immediately after a suspected toxic exposure. Do not wait for symptoms, and do not induce vomiting unless a veterinary professional specifically tells you to do so. PawMindTips’ list of household items poisonous to dogs can improve prevention, but an actual exposure requires case-specific guidance.
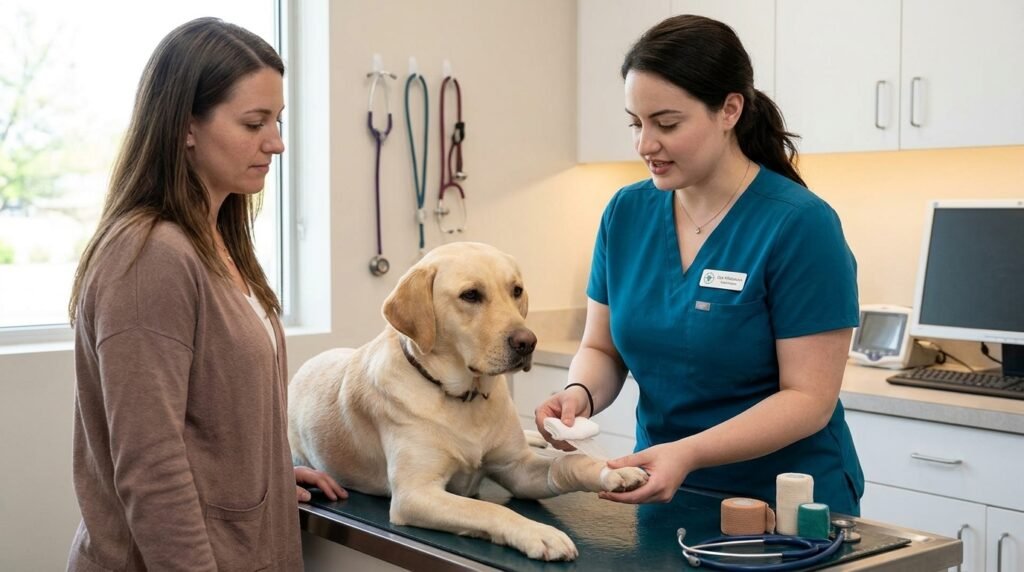
Take a pet first aid class and ask your clinic to demonstrate bandaging, safe lifting, temperature measurement, and emergency transport. Practice opening the case and reading labels, not procedures on your dog. Replace anything used during practice.
What Not to Put in a Dog First Aid Kit
More products do not make a dog first aid kit safer. Several common additions can create false confidence or cause harm.
- Human pain relievers: Ibuprofen, naproxen, acetaminophen, aspirin, and other drugs can be dangerous or inappropriate depending on the dog, dose, health history, and concurrent medicines. Include medication only when your veterinarian has prescribed it for that dog and provided written emergency instructions.
- Hydrogen peroxide for routine vomiting: Inducing vomiting is unsafe after some exposures and for some dogs. Keep it out unless your veterinarian has specifically directed you to maintain it and explained exactly when and how it may be used.
- Alcohol or hydrogen peroxide for wound cleaning: These products can damage healthy tissue and delay healing. Sterile saline is a safer basic irrigation choice while you seek guidance.
- Antibiotic, steroid, numbing, or essential-oil creams: Dogs may lick topical products, and ingredients that are acceptable for people may irritate or poison pets. Use only veterinarian-approved products.
- Expired prescriptions or leftover antibiotics: A drug prescribed for a past problem may be wrong for a new one. Dispose of it according to local pharmacy or veterinary instructions.
- Tourniquets and advanced airway tools: These require specific training and can cause severe harm when misused.
- Loose blades, needles, or unsecured chemicals: Sharp and leaking items endanger the dog and the person opening the kit.
Never give a medication simply because a checklist online recommends it. Your veterinarian needs to consider weight, diagnosis, organ function, allergies, pregnancy status, and drug interactions.
Maintain and Restock Your Dog First Aid Kit
Check your dog first aid kit every three months and before every major trip. Link the reminder to a routine household task.
During each check:
- Confirm that emergency phone numbers and clinic hours are current.
- Update weight, medications, allergies, vaccination information, and medical conditions.
- Replace expired, opened, wet, crushed, rusty, or contaminated items.
- Test the thermometer and replace its battery if needed.
- Check sealed saline and instant packs for leakage or swelling.
- Count gloves, gauze, pads, and bandage rolls.
- Wash used towels and return them only when completely dry.
- Review the inventory and restock immediately after any use.
Inspect vehicle kits more often because temperature swings shorten the useful life of some materials. Follow every manufacturer’s storage limits. If packaging is damaged or you cannot read the label, replace the item.
Keep a note inside the lid that says, “Call first; use only what you understand.” It is a useful safeguard when adrenaline creates pressure to act quickly.
When a Kit Is Not Enough: Emergency Warning Signs
A dog first aid kit supports the trip to care; it should never become a reason to monitor a true emergency at home. Contact an emergency veterinarian immediately for:
- Difficulty breathing, blue/gray gums, choking, or severe facial swelling
- Collapse, unresponsiveness, seizure, extreme weakness, or inability to stand
- Uncontrolled or heavy bleeding, pale gums, or a rapidly enlarging abdomen
- Major trauma, a vehicle strike, a fall, a bite with deep punctures, or a suspected fracture
- Suspected poisoning or ingestion of medication, chemicals, toxic food, or an unknown substance
- Heatstroke signs such as frantic or abnormal panting, weakness, vomiting, confusion, collapse, or abnormal gum color
- Repeated unproductive retching, marked abdominal swelling, or obvious severe pain
- Eye injury, deep burn, electrical injury, or an embedded object
- Persistent vomiting or diarrhea with weakness, blood, pain, or inability to keep water down
- Labor complications or maternal distress; owners should know the warning signs discussed in PawMindTips’ guide to dystocia in dogs
Call while another person prepares the car. Ask the hospital how it wants you to enter and whether staff can meet you with a stretcher. Use a leash or carrier when safe, minimize unnecessary movement after trauma, and keep your face away from the dog’s mouth.
FAQs
Can I buy a premade dog first aid kit instead of building one?
Yes, but audit the contents. Confirm that it has useful quantities, readable labels, suitable sizes, and no questionable medication. Add your dog’s medical card, local emergency contacts, a spare leash, and any veterinarian-approved item specific to your dog.
Where should I keep my dog first aid kit?
Keep the main kit in a cool, dry, clearly labeled location that adults can reach quickly but pets and children cannot. Maintain smaller duplicate kits for the car and travel rather than relying on one container that may be elsewhere when needed.
How often should I replace supplies in a dog first aid kit?
Review the kit every three months and before travel. Replace supplies at their printed expiration date or sooner if they are opened, damaged, wet, contaminated, exposed to improper temperatures, or used.
Should a dog first aid kit contain medication?
Only if your veterinarian has approved a specific medication for your specific dog and supplied clear written directions. Do not pack or give human pain relievers, leftover prescriptions, sedatives, or vomiting agents based on a generic online list.
Conclusion
A thoughtfully organized dog first aid kit gives you clean supplies, reliable information, and basic tools when a dog is hurt or suddenly ill. Start with the 15 essentials, divide them into labeled modules, keep separate home and travel versions, and inspect them every three months.
Preparation also means knowing the kit’s limits. Take a hands-on pet first aid course, save emergency numbers, and call a veterinarian early. When breathing, circulation, consciousness, poisoning, major trauma, heat illness, or severe pain is involved, use the kit only to support safe, prompt transport—not to replace professional care.